Showing posts with label Recipes. Show all posts

Thursday, December 9, 2010

Chicken Enchiladas

I love this recipe! It is great as leftovers as well. So if you are looking for a non-holiday meal, this could be for you.

Ingredients:

3 Chicken breast cooked and chopped (you can even use the canned chicken if you are short on time)
1 Can Cream of Chicken Soup
1 (8oz) pkg of sour cream
about 1/2 cup milk
3-4 cups shredded cheese of your choice
10-12 Flour tortillas (depends on what brand you buy and how big you make them)


Grease a 9X13 pan. Heat oven to 350F. 


Mix the sour cream, cream of chicken, and milk to make the "sauce." 


Spread some sauce on the bottom of the pan. 

I then shred the meat and add some seasoning (whatever sounds good and I have on hand). I'll add some seasoning salt and Cavender's seasoning if nothing else. 


Make the enchilada by spreading on the sauce, adding some shredded cheese and chicken. I set up my assembly line first. You will be messy once you start! 


Roll and insert in pan. 


Keep in mind you will need sauce to cover the top of the enchiladas to keep them moist. 


I cover with foil and bake for 40 minutes. The remove foil, add some shredded cheese to the top and cook another 5 minutes. 


Here is where I am a bad, bad blogger...
I forgot to take finished pictures :( Apparently I was hungry when I made these. 
If you makes these and take a picture, be a doll and share so we can all see. 

Enjoy!!

Wednesday, December 8, 2010

Cut Out Sugar Cookie Recipe

I love Christmas cookies!!
I collect cookie cutters so that would make sense! 
Every year I make some with family or friends. 
I have a few tips and an amazing recipe to help you with your cookie making. 

Cut Out Sugar Cookie Recipe: 
1 c. shortening
1/2 c. butter or margarine (1 stick)
2 c. sugar
4 eggs
2 tsp. vanilla
5 c. flour
2 tsp. baking powder
2 tsp. salt
Chill dough for one hour.
Cook At 400 for 6-8 minutes.

Now for the tips...
Tip #1- Don't make your dough too thin or too thick when you roll it out. 
Tip #2- I roll my dough out on parchment paper. Cut out my cookies and peel off the extra dough... NO more slanted gingerbread men from moving them from table to pan! 


My mother-in-law and niece cutting out their cookies on parchment paper. 

A little collage of some cookie making fun! 

I either do decorating icing to decorate them and leave them to set overnight or I do sprinkles before I bake the cookies. Whatever suits you and yours. 

Hope you enjoy your cookie making season! 
I will be linking with:


Thursday, December 2, 2010

Christmas Cookie Exchange

I LOVE CHRISTMAS COOKIES!
Well, any cut out cookies really!
Want proof?
I collect cookie cutters!
This all started when Mr. M and I went to Branson, MO for our honeymoon.
I fell in love with all the cookie cutters!
This picture doesn't reflect ALL of them...this was only one box after I unpacked from remodeling our kitchen.
Mr. M even made me a rack to hang them all on! 


So, why am I going on and on about cookies? 
Well, over at Pleasant Home they are having a Christmas Cookie Exchange. 


I will be taking part and I hope you do too!  

They have a linky party next Friday so get those recipe's and posts ready.

I am having a cookie party with Meagan from A Life Full of Love and Laughter on Wednesday.
We will definitely have some cute cookies to share and post!

Tuesday, August 17, 2010

Banana Milkshake

This is a recipe that I forgot about for a long time but one I grew up with. My mom used to make this for us. She never measured and I tried to today but it didn't work so well. Anyways, here it goes.

You need the following + a blender or immersion blender (that is how my mom made them-one cut at a time)
I used:
1/2 carton of french vanilla ice cream
3 bananas
maybe a cup of milk

I blended the ingredient in my blender. I added a little more milk that I should have because it was a little thin.
It made a total of 4 1/2 cups of milkshake. So, around four servings. I simply poured what I wanted and put the rest in a freezer ziploc and froze it for next time. I will just take it out and let it get a little softer and pour it in a cup by cutting the corner of the bag off.

Here is the final result....

and oh so yummy!

Variations: 

  • Use vanilla or plain yogurt instead of ice cream and leave out the milk, use frozen bananas (more like a smoothie)
  • Use a different fruit
  • Add in some peanut butter or better yet, Nutella
  • Use chocolate ice cream
  • Your own genius ideas... please share... I am in a milkshake funk lately!


Monday, August 9, 2010

Chocolate Gravy

I use this exact recipe for Chocolate Gravy that Melissa from The Path Before Me shared today, so I thought I would share it with you.

Tuesday, May 4, 2010

KitchenAid Mixer & Cake Decorating

There are those times in your marriage where you could just squeal because he gives into you and gets you a present that you know you will love forever. I know I will not be loved for this post because certain people Sarah may be jealous. But its ok! 

So, I am taking a FREE cake decorating class Thursday nights. Seriously, a lady at church is teaching the Wilton type courses to us! I was so jumping up and down because those classes at Hobby Lobby or Michaels are expensive!!
I have collected a lot of decorating tips and such over the years. I love to decorate cupcakes and cookies. Hence my wall of cookie cutters...
And not all of them were out a the box in this picture! 

In order to organize my cake decorating stuff and make it easier to got to class, I got this handy slightly ugly box. But it was cheap!! I mean economical...

 I had more pictures but they aren't loading! GRRR

So having to make icing every week, makes you really want one of these....

And courtesy of my hubby and Amazon.com I have have one on the way!! After reading a bazillion and two reviews, I ordered the 5 quart Artisan mixer. It is going to be white because it was $50 less than any other color. I am even more excited to get this little attachment FOR FREE.
It is a promotion from KitchenAid. Well, a rebate of sorts. Buy a KitchenAid mixer between now and the end of the month and you can get the food grinder or food slicer for free. After reading reviews on both, the grinder won because the slicer was not all it was cracked up to be. 

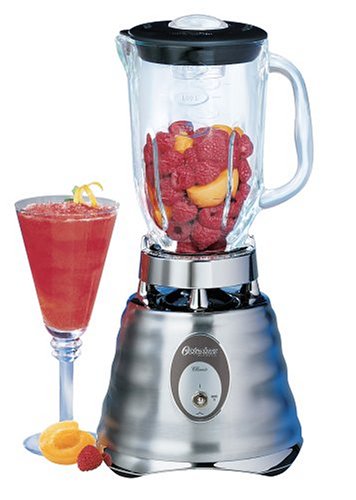
Oh and the hubs finally broke down and got me a new blender. And it is wonderful! Raspberry Strawberry smoothies here I come.
Looks like this!


Thank you Google for your host of images!

Thursday, March 25, 2010

Barbecue Chicken!! Yummmmmy

So, I thought I would share with you my first attempt at baking chicken. See, I can bake/cook any dessert you throw my way but when it comes to meat, I'm chicken (no pun intended). So, I decided to step it up and show you it can be done and taste ohhh soooo goood! *Sigh* Why didn't I do this sooner?!

I started out with my favorite chicken from Harps/Price Cutter. It is their Smart Chicken...no solution! Anywhoo, it makes for very juicy chicken! MMMM!
In order to save myself some clean up I covered my pan with aluminum foil and after reading somewhere to put the chicken on a cookie cooling rack (to make skin crispy/not sit in the juice) I thought it was a good idea.
Next, I pulled the skin down on the chicken and put some Seasoning Salt on them to add some flavor. You could add whatever you like. Then I pulled the skins back up. They create a nice little jacket to keep the moisture in.

I then baked them at 350F for 45 minutes. I turned them over a little over halfway through. Then when the 45 minutes was up, I pulled them out, pulled the skins off and basted with KC Masterpiece (MMM)! Then put back in the oven for about 5 minutes or so.

I meant to take a "pretty plated" picture but we were starving hungry. I also cooked a baked potato while I was cooking the chicken. It wasn't quite done so I nuked it for about 3 minutes and it was good to go. Oh, if you like my Pot Grabber Thingy, I have a link to make one here. I need to sew another one...I have the material cut out and all but hate sewing with bias tape :(
So, if you try this out let me know :) Don't be chicken anymore, I'm not!

Monday, February 8, 2010

As promised....Chocolate Covered Peanut Butter Cheesecake Balls Tutorial

Well, these "balls" ended up being hearts but we will get to that...

Here is the tutorial I promised! I used this peanut butter cheesecake recipe from allrecipes.com and I used a recipe from Crummb for the chocolate coating. Thanks to them for their contributions...I also have to thank my husband for his assistance in a few steps and for giving me a few tips or suggestions to pass on to you :) I will say that any cheesecake will work. If you don't want to make a homemade cheesecake you could use a store bought cheesecake.

Let me also warn you that I took a bazillion pictures so it will be a rather lengthy tutorial but I am a visual person and I hope the pictures will help.


Cheesecake Ingredients:
 

3 (8 ounce) packages cream cheese
3/4 cup peanut butter - preferably creamy
1 cup white sugar
2 tablespoons all-purpose flour
1 teaspoon vanilla extract
2 eggs
1 egg yolk
1/4 cup half-and-half cream

Coating Ingredients: 
50 lollipop sticks
1 pound eating chocolate (dark, milk or white)
2 tablespoons shortening

Steps: 
I always start with room temperature ingredients for your cheesecake. This is supposed to help with cracking and I believe it does. Also remember to not over-beat your ingredients. 
 
While I am waiting on these ingredients to come to room temperature I prepare the pan. Now because I am not making the normal cheesecake, I am doing this a little differently than the standard cheesecake. 

First, you need a pan (I used this because I don't use these pans near enough, they were the pans from my wedding cake). I would suggest you don't use a spring-form pan because the filling may spill out the bottom since there is no crust. I also use parchment paper.

  
Then you draw around the pan with a pen and cut about a quarter inch inside that line. 


Next spray the pan and then lay the parchment paper in the pan and spray the top of the parchment paper. I also spray my measuring cup that I plan on measuring the peanut butter in so that I can actually get it out of the cup.

Once the ingredients are room temperature, you can start mixing. Well, actually we need to get the oven ready. Since my pan won't fit inside any other pan that I have I opted to just fill a pan and put it on the rack below the rack the cheesecake will cook on. I fill the pan with water then preheat the oven to 375F, that way the water is already hot. {Water 'bath' is not required, but is suggested. If you can't do it, don't stress about it!}
Ok, back to the mixing of ingredients. I start by mixing the cream cheese, peanut butter, sugar, and flour, and vanilla.

The recipe says to mix until smooth. I mixed until mine looked like this.

Then add your eggs all at one time. Beating on low speed until combined.

Once it is combined, slowly mix in the heavy cream. Supposedly you should be able to stir it in but I just went slow with my mixer after giving up trying to hand stir.
 
The lumps are peanuts because I only had crunchy peanut butter.

Pour into your pan and place in the oven.

Patiently wait around 40 minutes or until the cheesecake is a light brown. The center of the cheesecake should not be set. How can I tell you ask? Gently shake the oven rack and if the center moves a little you are good. Then I turn off the oven and crack the door and let the cheesecake cool.

Once it is cooled off, you can move it to the refrigerator to chill for at least 3 hours. So, what did I do while I was waiting? Well, I talk the hubby into turning some popsicle sticks into the right sized sticks. I took on shot of this and then he moved the scissors into the picture by reading my mind and knowing they needed to be there. Gotta love him!

So, when you cheesecake is finally cool.... we had to figure out how to get rid of the rubbery coating on the top. My husband seems to think that in order to not have to deal with this that you should place parchment paper on top of the cheesecake before you bake it. If you try this, let me know how it works.
We ended up scraping the cheesecake with a fork until we scraped as much of the top off as possible.

Next, I started to think out load of how to do the next step of forming the balls. Well, my husband had the idea of using my small heart cookie cutter I have (I collect cookie cutters by the way). So, I cut out the hearts that came out with the cookie cutter and placed them on a cookie sheet lined with parchment paper. Wax paper would be fine as well.

Eric put the popsicle sticks in the hearts as I was cutting them out.
 
We also took the remaining cheesecake minus the edges and rolled it up to make actual cheesecake balls. 

We placed them in the freezer overnight because it was late by then. I would want them to be pretty frozen before I went on to the coating part.

Coating:
I started by melting 1/2 a bag of white chocolate chips in a coffee mug and 1/2 a bag of semi-sweet chocolate chips in another mug. I microwaved for 30 seconds then stirred and repeated the process until it was completely melted.

 Next, I added a tablespoon of shortening to each mug. I had to microwave one of them a little after adding the shortening until it was smooth.
 
Next, coat the hearts/balls with favored chocolate and set on wax paper or parchment paper. The way I kept the hearts/balls cold was by putting a bowl in the freezer, putting some balls in the bowl and working until they start to get warm. 


Use your imagination and add sprinkles or leave plain. Then refrigerate.


These are the finished hearts and balls. They were yummy but I don't care for the peanut butter cheesecake so in the future, I will stick with the plain cheesecake.