Showing posts with label tutorial. Show all posts

Tuesday, November 15, 2011

A little Christmas crafting...

I finally broke down and created a Pinterest account! It has been a love/hate relationship. I love the ideas and the organization. I hate the tech problems and the inherent desire to create something else...

As a family, since this is little bugs first Christmas, we decided she would get one present from us along with stocking stuffers. We would open these together Christmas morning. I never really had any family traditions so I wanted to be sure Jorja grew up with some. We have already made some salt dough ornaments with her hand print and footprint!

Since we didn't have any stockings before, I decided I wanted to make some and I was inspired by this lovely photo on Pinterest (imagine that).


The sad part is that there wasn't a tutorial :(
After searching around, I found this tutorial from Cluck, Cluck, Sew. She did a great job explaining how to do a cuff on the stockings. I also used this site for a template since I didn't have any stockings that I could just trace.
Well, here is what I created!


I used "Life is Good" font. I printed our initials out (mirrored). Then traced them onto some wonder under and ironed that onto the fabric then cut out the letters and ironed them on. Such an easy way to monogram!!

We are looking for a small Christmas tree to put up this year since Jorja is crawling and pulling up everywhere.

On other great news!! We decided that we will be adding on to our house in the spring. We'll add on a master bed and bath and another bedroom. That will give us 3 bedroom/2 bath! YAY! Plus we are going to take out a wall to create a big living/dining room. I can't wait. I have been collecting tons of inspiration on Pinterest. This will all be documented, of course, and it tie into our before and after posts that you can find here.

Monday, July 25, 2011

Making Apple Baby Food Using a Kitchen Aid Food Strainer Attachment

I knew I would want to make our own baby food. Save money, no preservatives, ya da ya da. So, I thought it would be a great idea to have the Food Strainer Attachment for my Kitchen Aid Mixer I got last summer. My mother-in-law got it for me for my baby shower gift. Saturday I broke it out and put it to good use.

I started with 6 Granny Smith and 6 Golden Delicious apples.


Start by washing your apples and removing stickers.


 I let my apples dry while I took care of Jorja.


Then slice your apples and remove the core. My apple slicer broke so I used a good 'ol knife.


 Since it is over 100 degrees lately, I wasn't about to turn on my oven so I steamed my apples until they were tender. Be sure to save the water in case you need to thin your apple puree. The water has the nutrients in it.


 Then I set up my mixer. The big bowl catches the puree and the smaller bowl catches the peeling or "junk."


 The junk comes out the little whole at the end of the strainer attachment.


Next, feed your apples through the strainer. I decided to run the junk through again just to make sure I didn't miss out on any yumminess, but I don't think it made a difference. Some reviews said there was a lot of waste but I didn't think it was more than if I had peeled the apples to start with. 
Then you can separate your apples into ice cube trays, store them in the fridge or use at the next meal.

I have been using this website for most of my baby food questions.
 They are pretty comprehensive. They have lists of what babies should eat and when. How to cook, make, and store baby food and even menus for later on.

**A note on cleaning the mixer and attachments- do it RIGHT AWAY! **
**Do not let it sit for any amount of time or it will be very hard to clean. **

And now for some cute baby pictures...


 She LOVES green beans! Can you tell?


 She wasn't a fan of mush o' banana but she liked it in her little baby feeder thing. If you aren't familiar with these, the part in her mouth is mesh and as she bites, the juice or mush comes out. Great for teething because you can put a frozen piece of fruit in there to soothe their gums.


Here she is eating her first Popsicle. I refuse to let her have ice cream so this was a Grandpa pleasing treat. She liked it. Everything in moderation- right?!

Thursday, July 14, 2011

Homemade Baby Food (Acorn & Butternut Squash)

When I made Jorja's first baby food, I was utilizing the squash from our own garden (free). Not a week later, Mr. M informs me that the squash is done because of our HIGH temperatures and lack of rain. So, when I went to Wal-Mart, I grabbed some Acorn and Butternut Squash. On my seriously long list of "to-do's" I added making baby food. So, after Jorja when down for her nap at 1:00 I started.
Cut squash lengthwise, scrape out seeds and place face down in baking pan. Put 1 inch of water in pan.  Bake at 400 degree for 40 minutes or until tender.

Nice and tender!

Put the meat of the squash in blender or food processor and puree.

I got these great silicone mini-muffin pans that work wonderfully for this. They hold right at 1 ounce. I use my small Pampered Chef scoop and it takes two to make one ounce!
Allow your little helper to assist you in your physical fitness by bending over 20 times to get the toys she drops.
While you are working, have a thunderstorm come with wild winds. Then have the power go out right as you go to mix up the Butternut squash. Dig out your food mill because it is time to feed your assistant. Since you don't have power, you can't microwave the already frozen summer squash, so you go for some butternut squash out of the food mill instead. Feed assistant and then have the power magically come back on before you attempt to make the rest of the butternut squash in the food mill.

Can't complain about picking up toys when you get to look at this cutie and her piggie tails!
Since I only have two mini-muffin pans, I use some ice cube trays that also work ok. Although, it is much easier to get out of silicone trays. I bang my trays on the counter to make them level and get out any bubbles.
Freeze them for a couple of hours and then transfer to freezer baggies. I label the baggies and then place them in a Tupperware container in the freezer for added protection from freezerburn. 

Do you make your own baby food? Have any tips to share? I would love to hear them!!

Bassgiraffe's Thoughts Thursday Blog Hop

Thursday, January 6, 2011

How to read a measuring tape...

I love Sew4Home website. 

They just posted a new tutorial on how to decipher a measuring tape and since not everyone is a math teacher, I thought I would pass along the valuable chart. 


You can go HERE and read the full article. I know this will be very helpful for most people. Remember to measure twice, or three or four times and cut once. TRUST me....it will save you some money and heartache when you are working on that adorable expensive fabric. 

Friday, April 16, 2010

Bags, Magnets, & Presents!

What have I been up to? Well, first of all this week, I made my mom an overnight bag. It is a super cute pattern I have had stashed away for far too long. I did the strap differently than I would do in the future but it is great for my mom how it is now. It has pockets on both sides!

Next, I made a present for a dear friend of mine's daughter. She is having a birthday this weekend and I had this bright idea in my head and finally put it together. The steps? Well, first I painted the edges with bright green paint. Then the hubby (king of spray adhesive) sprayed the letter and placed the paper on it.  Next he cut the letter out with an exacto knife. Repeated for the other side. Then I stapled the ribbon to it and glued the buttons on it. I didn't plan on adding buttons to the other side but the staple went all the way through the letter...oops! Still super cute!
The flower will be hot glued to a command strip hook to be hung in her room or on her door.
Next I made some magnets with leftover scrapbook paper. I sprayed the magnet with spray adhesive and trimmed the paper with an exacto knife. Then hot glued buttons and ribbon. These were ugly free magnets from conferences. Now they are super cute! I may be a little button crazy these days!

Wednesday, March 17, 2010

Ironing Board Cover

I was sick of the gross green ironing board cover and since I was about to iron out a bunch of fabric to make the two diaper bags I need to make, I decided I would do something I wanted to do. You see, seldom do I actually make items for myself! So, I thought during my spring break I would actually make something for me...unique idea huh!

So, I brought home some bulletin board paper and traced the ironing board on the paper with a good ol' Crayola marker.
Then I took my trusty ruler and marked 2 1/2 inches from my initial line. Then I connected the lines to make my pattern. I cut out the pattern on the brown line and then traced the pattern to the back of my fabric and cut it out.
I turned the edges under and sewed them and then laced elastic through the opening and tied the ends after cinching them together to make it tight on the ironing board. Really easier than I thought it would be. And I did just put the new cover over the old cover since it had the "normal" ironing board cover parts to it like the heat protectant layer stuff. I'm great with technical words ;)

Thursday, January 21, 2010

Felt Heart Wreath Tutorial

Here is my tutorial for my version of the heart wreath. I got a few ideas from these two blogs- The Idea Room , Blog N' Tell, and Design Sponge. I took ideas from each Blog and made my own creation. Let me tell you, ANYONE CAN DO THIS!! I promise!

So, I ended up using two piece of red felt that were each 36in by 36in from Michaels. I used a few coupons but the original price was $2.99 for one piece. I got the heart from Hobby Lobby and it was like $3 or $4. The pins I had got at a Super JoAnn's in California. It was like $3 for 750 pins but Wal-Mart has pins pretty cheap but you will need A LOT. I only had like maybe 150 left from the 750. Oh and you need some ribbon to display it.

I decided that I did not want to cut a million circles out so thank you to Blog N' Tell for using squares. I decided to fold mine like she does at Design Sponge where she folds the circles into quarters but I actually do it a little sloppy if you will like this.
Fold it in half.
Then in half again.

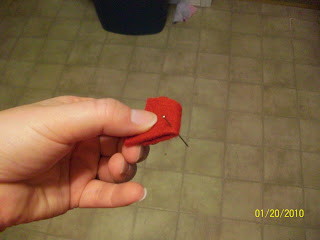
Then you put the pin in the corner.

I found that in order to save my thumb from hurting I would press the pin into the heart by starting it and then pressing it in using the felt. Trust me after you do a few of these, it can be painful.

I went around the heart and filled in. I did mine closer together than some but I love it.

This is the back. I just pinned some ribbon on the back.

And the finished product.

Displayed on my door....I LOVE IT!!

Wednesday, January 13, 2010

Paper Covered ClipBoard

I have to give credit where credit is due. My dear husband did just about all of this project besides supply the idea which came from here. So, this is pretty easy.
What you need:
  • Clipboard
  • Scrapbook paper
  • Spray Adhesive
  • Exacto Knife
  • Magnetic Tape
Since I had all this laying around my house this project was FREE!!

Step 1: We covered the the table with a towel that we didn't want any more because the over-spray will ruin the towel. I put my cutting board under the towel for future use.

Step 2: Decide the layout and where you want your paper. It would be a lot easier to use a full sheet of scrapbook paper that messing with individual pieces.

Step 3: Spray the back of the paper and the clipboard with the spray adhesive. Follow the directions on the adhesive but basically wait a few minutes until they are tacky. 
Step 4: Place the paper on the clipboard. THIS IS THE STEP YOU DON'T WANT TO MESS UP! Place the paper exactly where it needs to be because it will not be moveable.

Step 5: Place all the paper on one side and smooth with a credit card or hard plastic card that you don't want anymore.  The sticky will get on the card. Then let the clipboard dry for a few minutes.

Step 6: Take the exacto knife and cut around the clipboard.

Step 7: On the side with the clipboard part, we placed the paper right up next to the bottom of the clip. Then we put two more pieces on the edges rather than trying to cut out for the clip. Then trim the edges.

Step 8: Enjoy your masterpiece.