Monday, July 25, 2011

Making Apple Baby Food Using a Kitchen Aid Food Strainer Attachment

I knew I would want to make our own baby food. Save money, no preservatives, ya da ya da. So, I thought it would be a great idea to have the Food Strainer Attachment for my Kitchen Aid Mixer I got last summer. My mother-in-law got it for me for my baby shower gift. Saturday I broke it out and put it to good use.

I started with 6 Granny Smith and 6 Golden Delicious apples.


Start by washing your apples and removing stickers.


 I let my apples dry while I took care of Jorja.


Then slice your apples and remove the core. My apple slicer broke so I used a good 'ol knife.


 Since it is over 100 degrees lately, I wasn't about to turn on my oven so I steamed my apples until they were tender. Be sure to save the water in case you need to thin your apple puree. The water has the nutrients in it.


 Then I set up my mixer. The big bowl catches the puree and the smaller bowl catches the peeling or "junk."


 The junk comes out the little whole at the end of the strainer attachment.


Next, feed your apples through the strainer. I decided to run the junk through again just to make sure I didn't miss out on any yumminess, but I don't think it made a difference. Some reviews said there was a lot of waste but I didn't think it was more than if I had peeled the apples to start with. 
Then you can separate your apples into ice cube trays, store them in the fridge or use at the next meal.

I have been using this website for most of my baby food questions.
 They are pretty comprehensive. They have lists of what babies should eat and when. How to cook, make, and store baby food and even menus for later on.

**A note on cleaning the mixer and attachments- do it RIGHT AWAY! **
**Do not let it sit for any amount of time or it will be very hard to clean. **

And now for some cute baby pictures...


 She LOVES green beans! Can you tell?


 She wasn't a fan of mush o' banana but she liked it in her little baby feeder thing. If you aren't familiar with these, the part in her mouth is mesh and as she bites, the juice or mush comes out. Great for teething because you can put a frozen piece of fruit in there to soothe their gums.


Here she is eating her first Popsicle. I refuse to let her have ice cream so this was a Grandpa pleasing treat. She liked it. Everything in moderation- right?!

Friday, July 22, 2011

Giveaways- because I love you so..

Today is the LAST day to enter the giveaway over at G.I. Joe's Wife. You have pretty good chance of wining so go enter!! This giveaway ends at 10pm E.T.

 There is a new giveaway over at

There is also a surprise gift if you head over there and check it out! She has the easiest entry form for the giveaway. You won't have to comment each time but rather fill out her easy form!

HAPPY FRIDAY!

Wednesday, July 20, 2011

Jorja's Schedule & Babywise

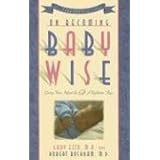
Before I ever had Jorja, I read Babywise by Gary Ezzo. Now I know, you have probably heard horrible things about this OR you have heard rave reviews. I am going to tell you about my experience and how it has turned out for us. I have a cousin that read Babywise and we loved being around her children and how well it worked for them. So, being the reader that I am, I grabbed the book and read it a whole year before I was even pregnant.

Then we had her and new mommy fear took over. I was so afraid Jorja was going to choke on her own spit and so she ended up sleeping with us for the first two weeks. Because of the breastfeeding issues I had, I was persuaded to feed on demand. By two weeks- I was about to loose my mind. Then I was able to talk to my cousin and she reminded me about Babywise. Since on-demand feeding was not working for us, what would it hurt to start working on Babywise? Since I couldn't call my cousin every minute of the day, I got out my Babywise book and reread pieces of it. Then I started searching the internet for some POSITIVE Babywise information. This is when I came across an amazing website and Google group.
This amazing woman, Valerie, is queen of Babywise. She has three children of her own which results in a lot of experience with all things baby and Babywise. She also created a Google Group for the blog so you can get real advice from other moms!

Back to Jorja's story....

We started working on getting Jorja on the Eat-Wake-Sleep pattern. This was easy enough. Then we worked towards 2.5-3 hr schedule and we managed to do that. What really made the difference and I believe led to her sleeping through the night, was starting her day at the same time. So, we would get up between 7 and 7:30 and within a week she was sleeping through the night. Jorja dropped her middle of the night feeding on her own by 12 weeks. I would feed her at 10:30 and then she would go all the way through! We have worked through our other steps and we are now on a four hour schedule.

Here is was a typical day for Jorja looks like.

7-7:30 Wake up, nurse
9 Naptime
11 Nurse & cereal + vegetables
12:15-12:30 naptime
3 Nurse & cereal + vegetables
4:45-5 Nap (if we are home)
Around 6 (just depends) Nurse
7:15-7:30 Bedtime

Keep in mind I am NOT a morning person and we are working on having fruit and cereal for her breakfast as soon as she gets fruit that is. According to Babywise II they should have fruit and cereal for breakfast, vegetables and fruit for lunch and vegetables and cereal for dinner. Since we felt it was important to get some good veggies in her before fruit, we are working towards the goal of what Babywise II recommends. Since you have to wait 3-7 days to introduce a new food, it take a little while. Green beans and bananas are on the schedule for this week!

Here are a few reasons why Babywise works for us:
  1. I have a need to be organized and Babywise allows me to have a schedule while still being able to be FLEXIBLE and take care of our needs.
  2. Babywise gives me guidance on things that I would have no clue about (how much food and when)
  3. It combines the child's needs along with my judgment to make the best decisions. I am not letting my 6 mo old make the decisions but I do use her needs as a guide. 
  4. Babywise is more than just a schedule. It is a way of life. One of the biggest things I have taken away is that I need to "begin as I mean to end." So, if I don't want to have to rock, sing, bounce, soothe, etc my child to sleep when they are 3, why would I start that habit now? If you do these things, that is your own personal desire and that is fine, it just doesn't work for us. Trust me I get enough grief for not rocking my child to sleep but my daughter is 6 months old and she puts herself to sleep. I consider this a good thing.
Just like with anything in life, you have to make your own personal decisions on what works for you. I am not trying to jam my opinions down your throat but rather share our story.
A few questions for you...
Have you heard of Babywise before? Was what you heard positive or negative?
Do you actually know someone who has used Babywise?
What do you think about it?

Hope you have a great Wednesday!

Friday, July 15, 2011

Giveaway!! @ G.I. Joe's Wife

Have you been admiring the cash and coupon organizers? 
Well, here is your chance to win an organizer and change purse. 
My bestie is hosting this giveaway!


Head over to G.I. Joe's Wife and enter to win this set! 


She will be offering one entry for voting for your favorite fabric. 
This is going to be very helpful as I stock my etsy store! 
So hurry and go vote!

All entries must be submitted by July 22, 2010 10pm E.T.

Thursday, July 14, 2011

Homemade Baby Food (Acorn & Butternut Squash)

When I made Jorja's first baby food, I was utilizing the squash from our own garden (free). Not a week later, Mr. M informs me that the squash is done because of our HIGH temperatures and lack of rain. So, when I went to Wal-Mart, I grabbed some Acorn and Butternut Squash. On my seriously long list of "to-do's" I added making baby food. So, after Jorja when down for her nap at 1:00 I started.
Cut squash lengthwise, scrape out seeds and place face down in baking pan. Put 1 inch of water in pan.  Bake at 400 degree for 40 minutes or until tender.

Nice and tender!

Put the meat of the squash in blender or food processor and puree.

I got these great silicone mini-muffin pans that work wonderfully for this. They hold right at 1 ounce. I use my small Pampered Chef scoop and it takes two to make one ounce!
Allow your little helper to assist you in your physical fitness by bending over 20 times to get the toys she drops.
While you are working, have a thunderstorm come with wild winds. Then have the power go out right as you go to mix up the Butternut squash. Dig out your food mill because it is time to feed your assistant. Since you don't have power, you can't microwave the already frozen summer squash, so you go for some butternut squash out of the food mill instead. Feed assistant and then have the power magically come back on before you attempt to make the rest of the butternut squash in the food mill.

Can't complain about picking up toys when you get to look at this cutie and her piggie tails!
Since I only have two mini-muffin pans, I use some ice cube trays that also work ok. Although, it is much easier to get out of silicone trays. I bang my trays on the counter to make them level and get out any bubbles.
Freeze them for a couple of hours and then transfer to freezer baggies. I label the baggies and then place them in a Tupperware container in the freezer for added protection from freezerburn. 

Do you make your own baby food? Have any tips to share? I would love to hear them!!

Bassgiraffe's Thoughts Thursday Blog Hop

Tuesday, July 12, 2011

Etsy!!

I finally took the plunge and opened an etsy.com store!! 
You can now find me there as well as Facebook! 
I only have a few items on etsy so far. 
But I will be adding more and more.
Mr. Magnificent also has a button!! I finally found a good enough tutorial on how to make one. So, don't forget to grab yours!

Photobucket
/>

Wednesday, July 6, 2011

New Organizers!

I would like to take a moment and tell you about my latest accomplishments!
  1. I spent nearly 3 hours cleaning and organizing my sewing area. All of my fabric is now organized and arranged by color. I have a place for my templates, patterns and interfacing! I even cleaned off my sewing table so I am ready to start whipping out my latest projects.
  2. I figured out how to do an accordion fold for my cash/coupon organizers! It gives the wallets so much more room for whatever you decide to use them for. My sister (this one is hers) uses hers for her cash and her coupons since she doesn't coupon much.

3. I made a change purse to match my organizer!


4. I made homemade baby food for the first time! Jorja will be 6 months old next Friday and I had some squash from our garden so I went for it. I steamed the squash after peeling it and chopping it up. Then I put them in the blender and viola-puree! Next I put them in some silicone mini-muffin pans and ice cube trays in .5 or 1 ounce quantities. Froze them for a couple hours and transferred them to a zipper bag in the freezer!

5. My hubby made me some Plexiglas templates for the cash/coupon organizers so I don't have to measure each time=faster=more products! Not my accomplishment, but Mr. M gets credit!

So, if you love my organizers you can check out my Facebook page by clicking below and order yours today!

I would love it if you voted for your favorite fabric while you are there as well! I will be doing a giveaway soon and want to know what you would like for the fabric!